What “iPad is Disabled” really means right now
You usually see “iPad is Disabled” after too many wrong passcode attempts in a row. iPadOS treats that as a security risk, so it blocks the passcode screen for a period of time (or fully locks you out) to protect whatever’s on the device. Sometimes this happens because a child kept guessing, a pocket kept tapping the screen, or a classroom iPad got passed around.
What it means in practice is simple: you can’t “try harder” or use Face ID/Touch ID to bypass it. Your realistic paths are to wait out a timed lockout if the screen allows it, or erase and restore the iPad using iCloud or a computer. If the iPad is linked to an Apple ID with Find My on, you’ll also need that Apple ID and password to use it again after a reset.
Check the screen: timed lockout or “connect to computer”?
Look closely at the exact message on the iPad, because it determines whether you can recover without erasing. If you see “iPad Unavailable” or “iPad is Disabled” with a countdown like “try again in 15 minutes,” the device is in a timed lockout. The safest move is to stop guessing, wait for the timer to finish, and then enter the correct passcode once. More wrong attempts can extend the delay and may push you into a state where erasing is the only option.
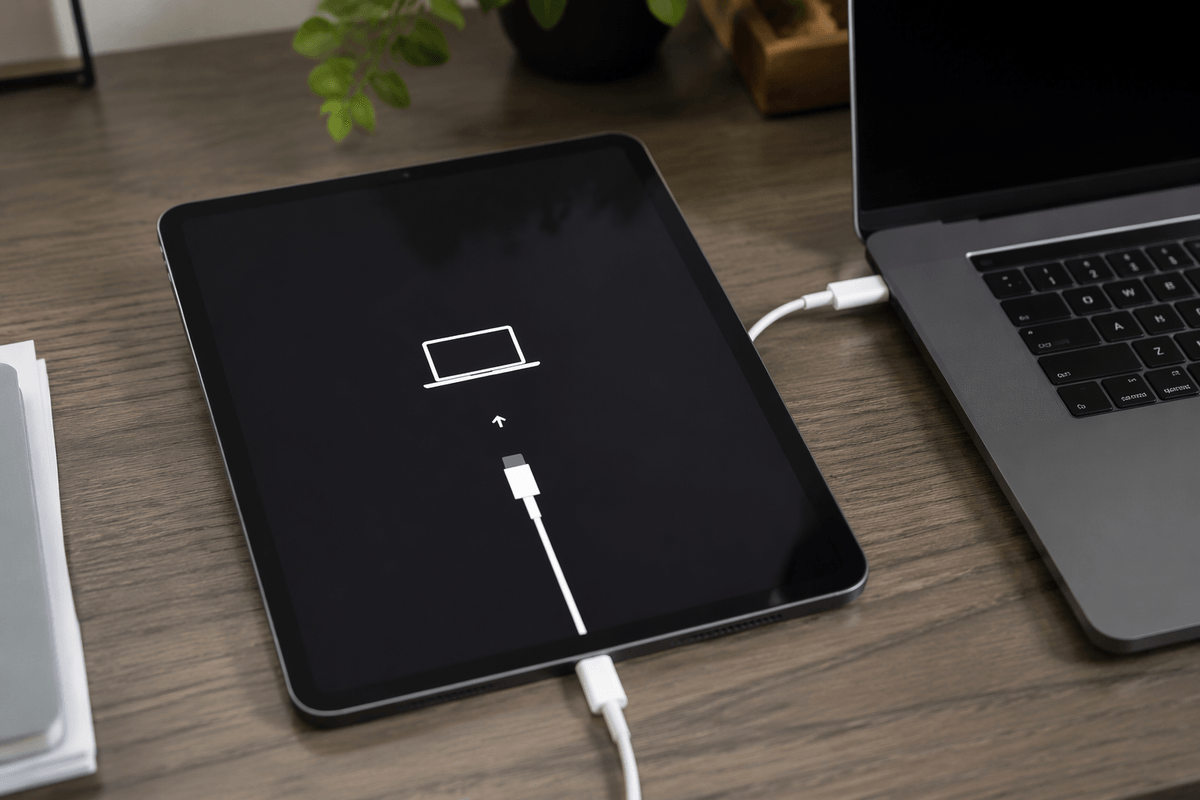
If the screen says “connect to computer,” “iPad Unavailable” with no timer, or it won’t accept any input, you’re past the waiting stage. At that point, getting back in typically means restoring the iPad with a computer (or erasing through iCloud if Find My is enabled), and your Apple ID may be required afterward.
Before you erase anything: what you should gather first
It’s tempting to jump straight to “erase iPad,” but take two minutes to collect what will make the reset go smoothly. First, confirm which Apple ID the iPad is tied to (the one used for Find My/Activation Lock) and make sure you know the password; if you don’t, start account recovery now, because you can’t finish setup after a restore without it. If you have a parent/teacher-managed iPad, also have the school or organization confirm whether it’s supervised and who can remove it from management.
Next, figure out your best chance of keeping data: do you have a recent iCloud backup, or a backup on a Mac/PC that previously synced with this iPad? If you’ll use a computer, grab the right cable/adapter and plan for time—restores and updates can take 30–90 minutes and need stable internet.
Choose your way back in: keep data, or start over?
The decision comes down to whether you have a backup you can restore from. If you can wait out a timer and you’re confident you know the correct passcode, that’s the only route that keeps everything on the iPad exactly as-is. If you’re past the timer stage, Apple’s lockout is designed so you can’t get back in without erasing the device.
Erasing doesn’t automatically mean losing everything forever. If you have an iCloud backup (or a computer backup), you can wipe the iPad, sign in with the same Apple ID during setup, and restore your apps, photos, and settings. If you don’t have a backup, “start over” means a clean iPad and you’ll only get back what was already synced to iCloud (like some photos, contacts, notes) or stored elsewhere. The practical constraint is time: restores can take an hour or more, and you’ll need reliable Wi‑Fi plus that Apple ID password to clear Activation Lock.
If Find My is on: erase with iCloud (no computer)
If Find My was turned on for this iPad, you can erase it remotely with iCloud and don’t need a computer. On a phone or any web browser, sign in to iCloud with the same Apple ID the iPad is tied to, open Find My, select the iPad, and choose Erase iPad. Leave the iPad connected to Wi‑Fi (or cellular, if it’s a cellular model) and on power; if it’s offline, the erase will queue and run the next time it reconnects.
This method always wipes the iPad, so you’ll only get your stuff back by restoring from an iCloud/computer backup or re-downloading what was already synced. After the erase, setup will ask for that Apple ID password to clear Activation Lock—without it, the iPad won’t be usable.
Use a computer: restore with Finder or iTunes
If you have access to a Mac or Windows PC, a restore through Finder (Mac) or iTunes (Windows, or older macOS) is the most reliable “connect to computer” fix. Plug the iPad in, open Finder or iTunes, and select the iPad when it appears. If you see an option to Update, try that first—it attempts to reinstall iPadOS without wiping. If Update fails or you only see Restore, a restore will erase the iPad and install a fresh copy of iPadOS.
Restores can take 30–90 minutes and may restart the iPad more than once, so keep it on power and don’t use a flaky USB hub. If the download takes too long and the iPad exits the restore screen, just reconnect and try again. When setup starts, you’ll need the Apple ID and password tied to Find My to get past Activation Lock and then choose an iCloud/computer backup (if you have one).
When normal restore fails: Recovery Mode and what to try next
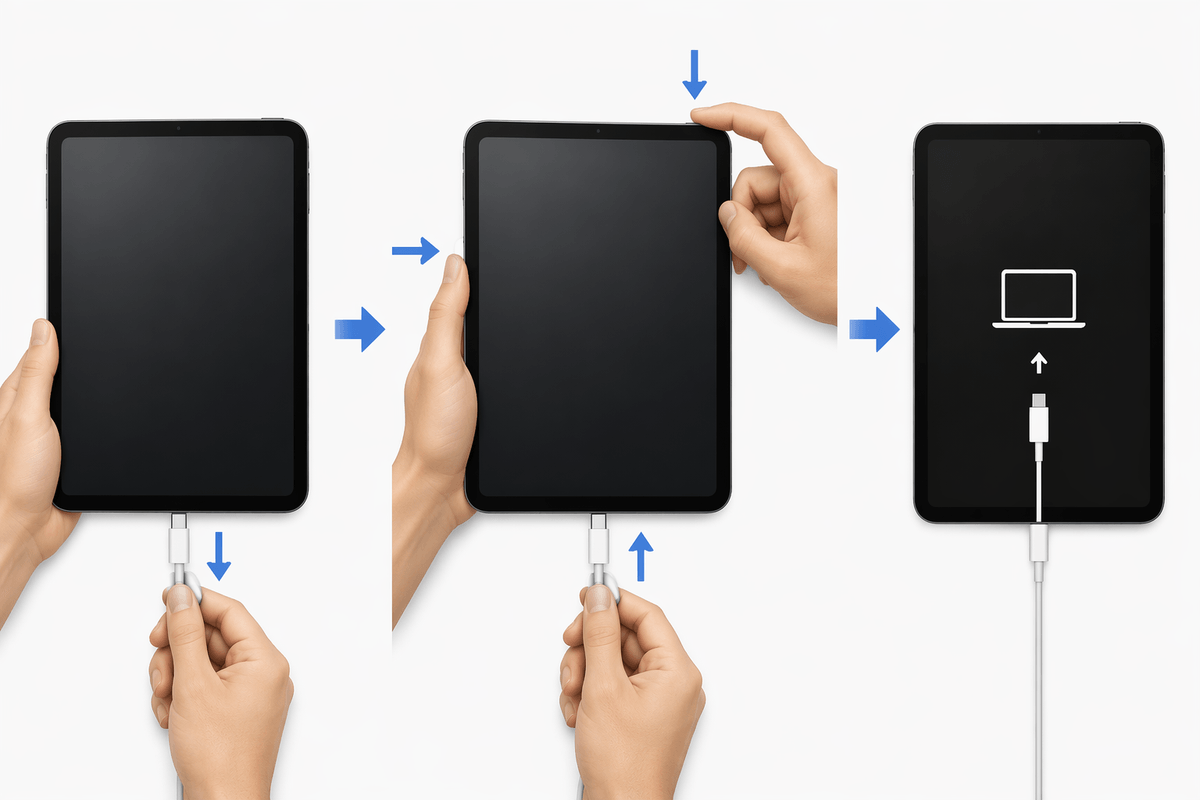
You’ll usually reach for Recovery Mode when the iPad won’t show up in Finder/iTunes, keeps rebooting, or Update/Restore errors out repeatedly. Disconnect the cable, then connect it again while holding the correct button combo for your model until you see the computer/cable screen (not the Apple logo). Keep holding until Finder/iTunes offers Update or Restore. Try Update first if it appears; if it fails, you’re back to Restore, which erases the iPad.
If the iPad drops out of Recovery Mode during a long download, reconnect and try again—downloads over a slow connection can take long enough that the iPad times out. Use a direct USB port, a known-good cable, and skip USB hubs when possible. If Finder/iTunes still can’t complete the restore, use a different computer or network before assuming the iPad has a hardware problem.
After you’re back in: prevent the next lockout
The easiest prevention is boring: slow down passcode attempts and limit who can try. If kids use the iPad, set a simple, memorable passcode for you (not them), then use Screen Time to restrict passcode changes and account changes, and consider Guided Access for apps that get “button mashed.” If it’s a shared classroom iPad, keep it supervised/managed so staff can reset it without guesswork.
Also fix the “I forgot again” problem: turn on iCloud Backup, verify it finishes on Wi‑Fi overnight, and confirm you can sign in to the Apple ID (update the password and recovery info now, not during a lockout). The trade-off is extra setup time and, sometimes, paying for more iCloud storage.