What feels weird first when you leave Windows
The first weird thing is that macOS doesn’t treat apps and windows as the same thing. You can close a window and the app may still be “running,” which is normal here. The menu bar also stays at the top of the screen instead of living inside each window, so you’ll glance up more often. File handling feels different because many apps prefer a “recent documents” view rather than pushing you into folders every time. Even settings can feel scattered at first. The good news is you only need a handful of new habits to feel fast again.
Expect a day of small friction: right‑click is there, but some actions live behind Control‑click; the red/yellow/green window buttons don’t match Windows minimize/maximize exactly; and installing apps often means dragging an icon to Applications, which feels too simple to trust. A practical constraint: if you keep trying to do everything “the Windows way,” you’ll waste time hunting for equivalents. You’ll get productive faster by learning the few Mac defaults you’ll use constantly, then letting muscle memory catch up.
Stop fighting the keyboard: Command, Option, and shortcuts
Your hands will keep reaching for Control, but on a Mac the Command key (⌘) is the one you use all day. Treat it as your new “Ctrl for shortcuts”: ⌘C/⌘V copy and paste, ⌘X cut, ⌘Z undo, ⌘S save, ⌘A select all, ⌘F find, and ⌘W closes the current window. If you want to quit the app, it’s ⌘Q. That one matters, because closing a window doesn’t necessarily stop anything.
Option (⌥) is the modifier that reveals “the other version” of an action. Hold ⌥ while clicking menus to see extra choices, and learn a few high-impact shortcuts: ⌘Tab switches apps (like Alt+Tab), ⌘Space opens Spotlight, and ⌘Backspace deletes files in Finder. A real constraint: some Windows-style combos are taken by the system or apps, so you may need to retrain a couple of favorites rather than forcing a perfect 1:1 map.
Trackpad and Mission Control make windows manageable
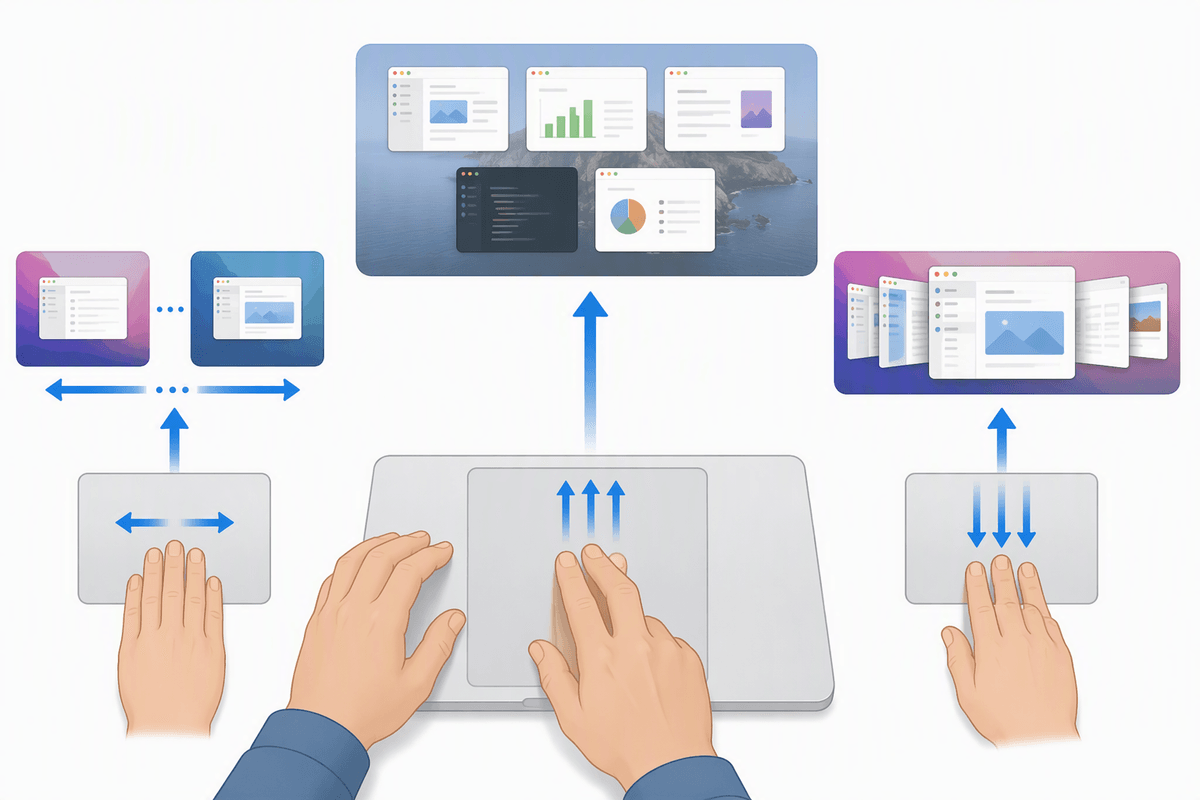
You’ll notice pretty quickly that macOS is less about snapping windows and more about getting to the right “space” fast. If you have a trackpad, learn three gestures and window chaos mostly disappears: swipe up with three or four fingers to open Mission Control (see everything), swipe left/right with three or four fingers to move between desktops, and swipe down on an app to see its open windows (App Exposé). The mental shift is simple: instead of resizing and arranging every window, you group work by desktop and jump to it.
Create a new desktop in Mission Control (look for the plus button at the top) and dedicate one to mail/chat, one to your main work, and one to reference material. Full-screen apps aren’t “maximized” so much as put into their own space, and you can split two apps side by side with Split View (hover the green button). A practical constraint: not every app behaves nicely in Split View, and too many desktops can be as messy as too many windows, so keep it to a small set you can remember.
Finder basics you actually need (and what to ignore)
You’ll open Finder looking for “This PC” and a drive list, but the fastest path is using the sidebar and a couple of views. Pin the places you actually use: your Desktop, Downloads, Documents, and any project folder (drag it into Favorites). Use List view for real work (it sorts cleanly), and Column view when you’re drilling through nested folders. Quick Look is the hidden superpower: select a file and press Space to preview PDFs, images, and many docs without opening an app.
Ignore most of the noise at first: “Recents” is fine for finding something you just touched, but it’s not a real folder, so don’t try to organize inside it. You also don’t need to think about “libraries,” “packages,” or the hidden system folders—if you go hunting, you can break an app by moving the wrong thing. When you do need a Windows-like path, show the Path Bar (View > Show Path Bar) and use ⌘Delete to send files to Trash, then empty it when you actually want the space back.
Search first: Spotlight, quick actions, and system controls
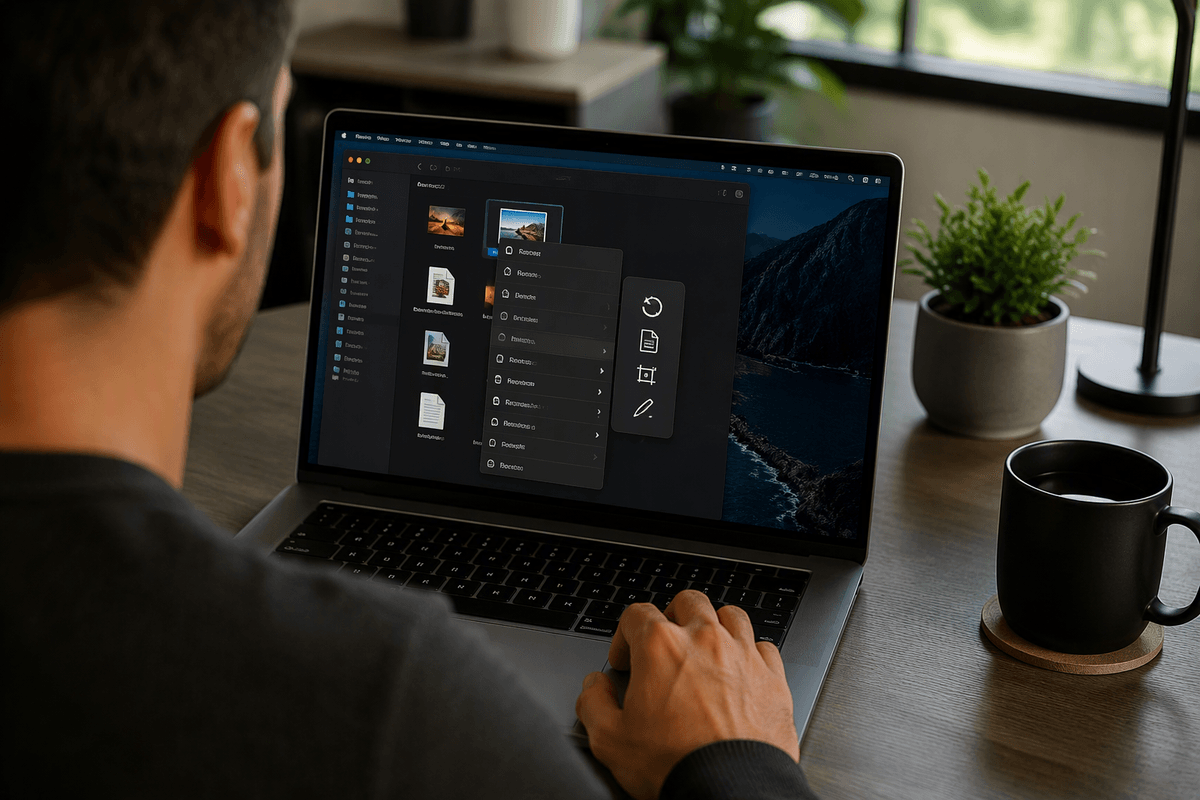
You’ll catch yourself opening Finder or digging through System Settings for things you do ten times a day. Don’t. Hit ⌘Space and start typing. Spotlight finds apps, files, contacts, and can also do quick math, unit conversions, and basic definitions without opening a browser. If you remember “what” but not “where,” Spotlight is usually faster than browsing folders. One practical limitation: Spotlight only works well if the file is indexed, so brand-new external drives or some cloud folders can take a bit before results feel complete.
Use it like a control panel, too: type “Bluetooth,” “Wi‑Fi,” “Display,” or “Focus” and jump straight to the right System Settings page. For small actions, look for the Quick Actions button in Finder (or right‑click a file): rotate images, create PDFs, trim a video, or mark up a screenshot without launching a full app. The habit to build is simple: search first, open second, and you’ll stop caring where Apple “hid” the setting.
Install, uninstall, and update apps without the clutter
You’ll install your first Mac app and think, “That’s it?” Many apps are a simple drag-and-drop: open the downloaded .dmg, drag the app into Applications, eject the disk image, and delete the installer file from Downloads. If macOS blocks an app as “from an unidentified developer,” go to System Settings > Privacy & Security and allow it once—don’t go hunting for random “cleaner” tools to force it through.
Uninstalling is usually just deleting the app from Applications (then emptying Trash). For apps installed through the App Store, remove them from Launchpad or the Applications folder and updates happen in the App Store. For apps you installed directly (like Chrome), they’ll typically update themselves inside the app. A real constraint: some apps leave small support files in Library folders, so if you’re tight on disk space, use the app’s built-in uninstaller when it offers one, or accept that a “perfectly clean” removal can take extra time.
Protect your stuff: backups, screenshots, and file sharing
You’ll eventually lose a file, spill coffee, or just buy a new Mac. Set up Time Machine once so it’s a non-event: plug in an external drive, say yes when macOS asks to use it for backups, and let it run in the background. If you use iCloud Drive, it’s great for syncing, but don’t treat it as your only backup—sync can also sync mistakes (like deleting the wrong folder). A practical constraint is cost: a dedicated backup drive is an extra purchase, but it’s cheaper than recovery.
Screenshots are built in and worth memorizing: Shift+⌘3 grabs the whole screen, Shift+⌘4 lets you select an area (press Space after that to capture a window), and Shift+⌘5 brings up a simple toolbar for screenshots and screen recording. For sharing files, start with AirDrop for nearby Apple devices, or right‑click a file and use Share for Mail, Messages, or creating a quick link. When someone needs a Windows-friendly format, zip a folder (right‑click > Compress) before sending.